Flexi Subscription lets you convert a WooCommerce product into a recurring subscription product by enabling the Subscription option in the Product Data section. Once enabled, you can configure billing frequency, trial periods, renewal pricing, and other subscription-specific settings.
Before You Begin #
Make sure:
- WooCommerce is installed and activated.
- Flexi Subscription is installed and activated.
- You have permission to create or edit WooCommerce products.
Create a Subscription Product #
To create a new subscription product:
- Go to Products → Add New.
- Enter the product name, description, and other product details.
- Scroll down to the Product Data section.
- Keep the product type as Simple Product.
- Enable the Subscription checkbox.
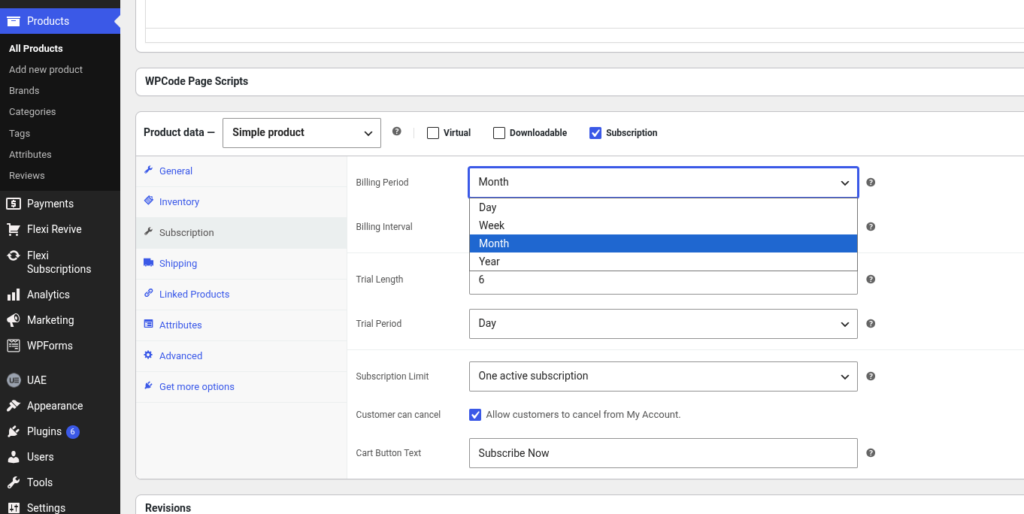
Enabling the subscription option adds a new Subscription tab where you can configure recurring billing.
Configure Subscription Settings #
Open the Subscription tab and configure the required settings for your subscription product.
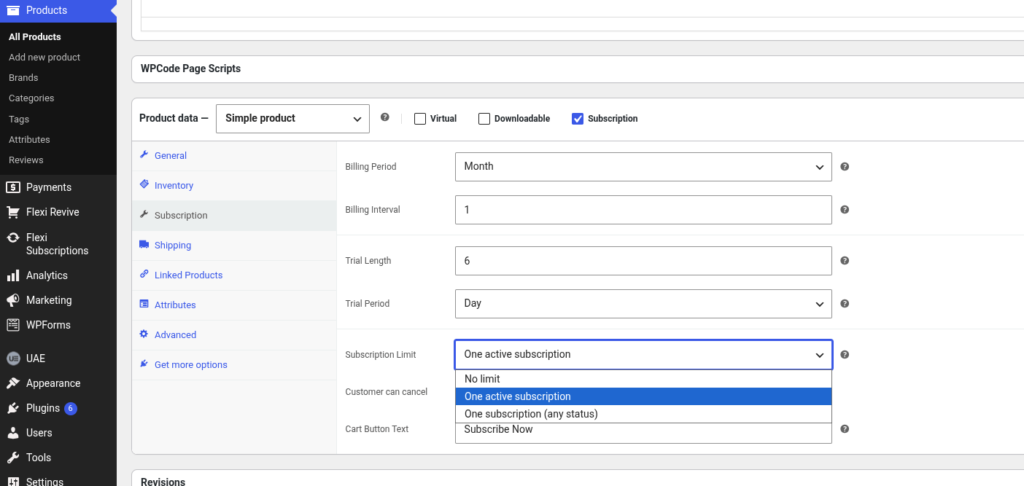
| Setting | Description |
|---|---|
| Billing Period | Choose how often the subscription renews (Day, Week, Month, or Year). |
| Billing Interval | Set the number of billing periods between renewals. |
| Trial Length & Trial Period | Configure an optional free trial. |
| Subscription Limit | Control how many subscriptions a customer can purchase. |
| Customer Can Cancel | Allow customers to cancel their subscription from their account. |
| Cart Button Text | Customize the subscription button text. |
Tip: Leave Max Billing Cycles as 0 if the subscription should continue until cancelled.
Publish the Product #
After configuring the subscription settings:
- Review the product information.
- Click Publish or Update.
Your subscription product is now ready for customers to purchase.
Best Practices #
- Verify your billing period and interval before publishing.
- Test the subscription purchase flow before going live.
- Use clear product descriptions to explain the recurring billing terms.
- Confirm your payment gateway supports recurring payments.