Creating a subscription product in Flexi Subscription is similar to creating a standard WooCommerce product, with additional subscription settings for recurring billing, trials, renewals, and delivery schedules.
This guide walks you through the complete process—from creating your first subscription product to placing a test order and understanding what happens after a customer subscribes.
Overview #
Before customers can purchase recurring products, you’ll need to create at least one subscription product and configure its billing settings.
This tutorial covers how to:
- Create a new subscription product.
- Configure subscription options.
- Publish the product.
- Place a test subscription order.
- Understand the subscription lifecycle.
Video Tutorial: Watch the accompanying video for a complete walkthrough of the subscription creation process.
Before You Begin #
Make sure the following requirements are met:
- WordPress is installed.
- WooCommerce is active.
- Flexi Subscription is installed and activated.
- At least one payment gateway is configured.
Create a New Product #
Start by creating a new WooCommerce product.
- Go to Products → Add New.
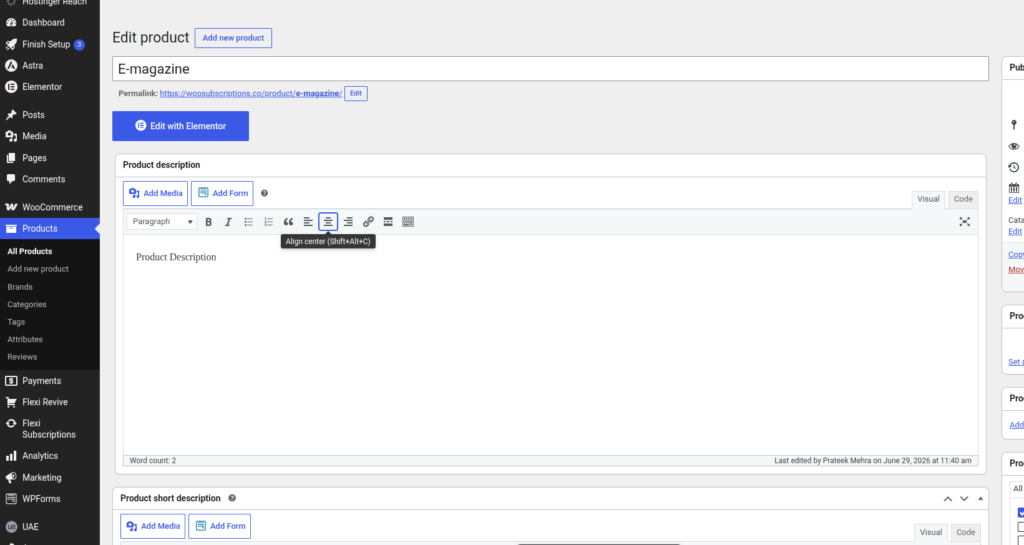
- Enter a product name.
- Add a product description.
- Optionally add a short description, product image, and product gallery.
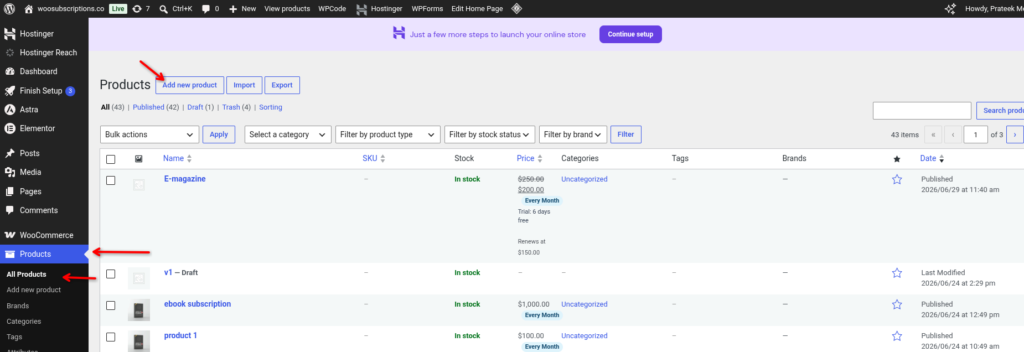
Once the basic product information is ready, you can configure it as a subscription product.
Enable Subscription Mode #
Scroll down to the Product Data section.
To enable recurring billing:
- Leave the product type as Simple Product.
- Check the Subscription option.
Once enabled, a new Subscription tab appears inside the Product Data panel.
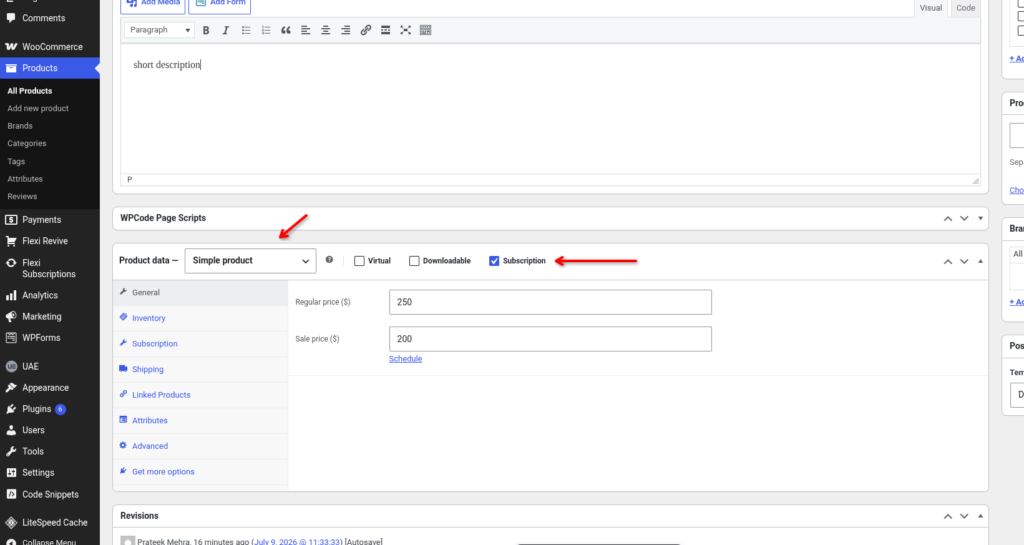
Note: Subscription settings only become available after enabling the Subscription option.
Configure Subscription Settings #
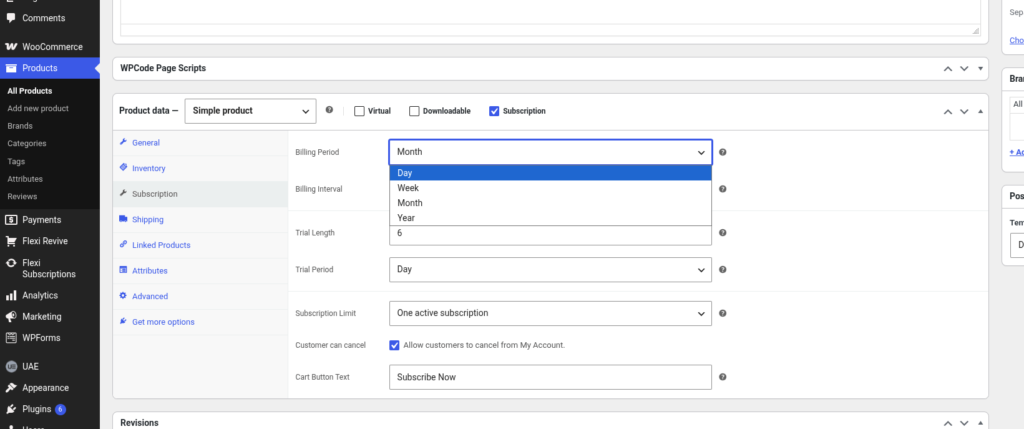
Open the Subscription tab to configure how the product renews and behaves throughout its lifecycle.
Free Version #
Pro Version #
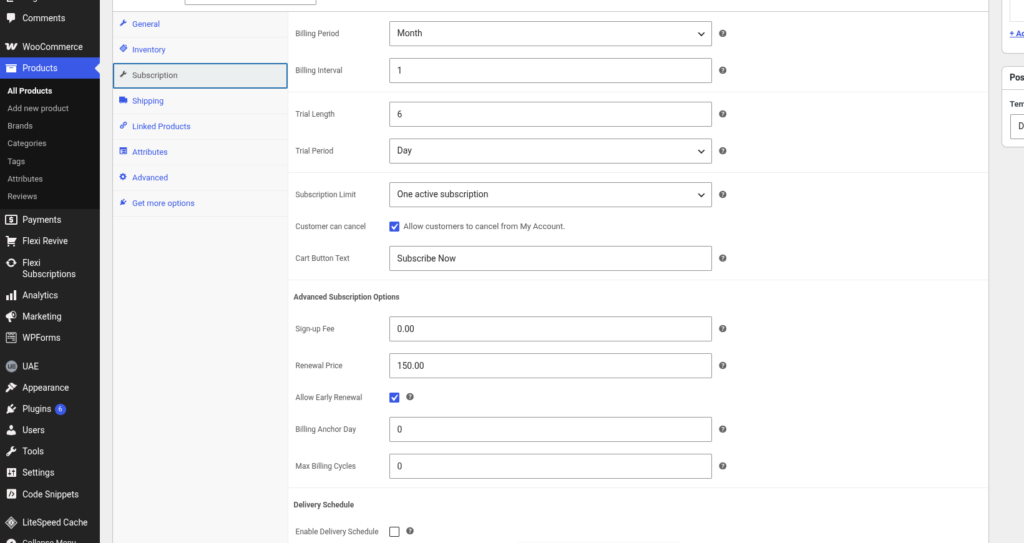
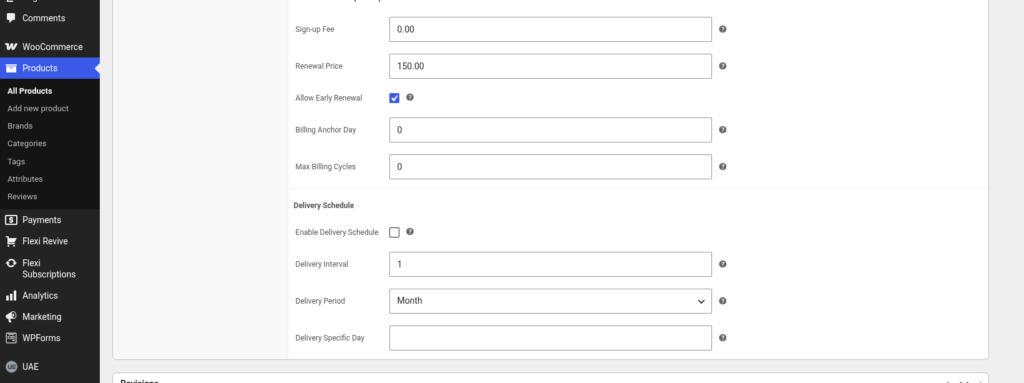
The available options include:
| Setting | Description |
|---|---|
| Billing Period | Defines the billing unit, such as Day, Week, Month, or Year. |
| Billing Interval | Specifies how often the subscription renews within the selected billing period. |
| Trial Length | Sets the duration of the free trial. |
| Trial Period | Defines whether the trial is measured in days, weeks, months, or years. |
| Subscription Limit | Controls how many active subscriptions a customer can purchase. |
| Customer Can Cancel | Allows customers to cancel their subscription from the My Account page. |
| Cart Button Text | Customizes the subscription button displayed on the product page. |
Advanced Subscription Options #
Additional settings provide more control over recurring billing.
| Option | Description |
|---|---|
| Sign-up Fee | Charges a one-time fee when the subscription starts. |
| Renewal Price | Sets the amount charged for each renewal. |
| Allow Early Renewal | Lets customers renew before the next scheduled payment date. |
| Billing Anchor Day | Aligns recurring payments to a specific day. |
| Max Billing Cycles | Limits the total number of renewals before the subscription ends. |
Tip: If you leave Max Billing Cycles as 0, the subscription continues until it is cancelled or expires according to your configuration.
Configure Delivery Schedule (Optional) #
If your subscription includes recurring deliveries, you can configure a delivery schedule directly from the product settings.
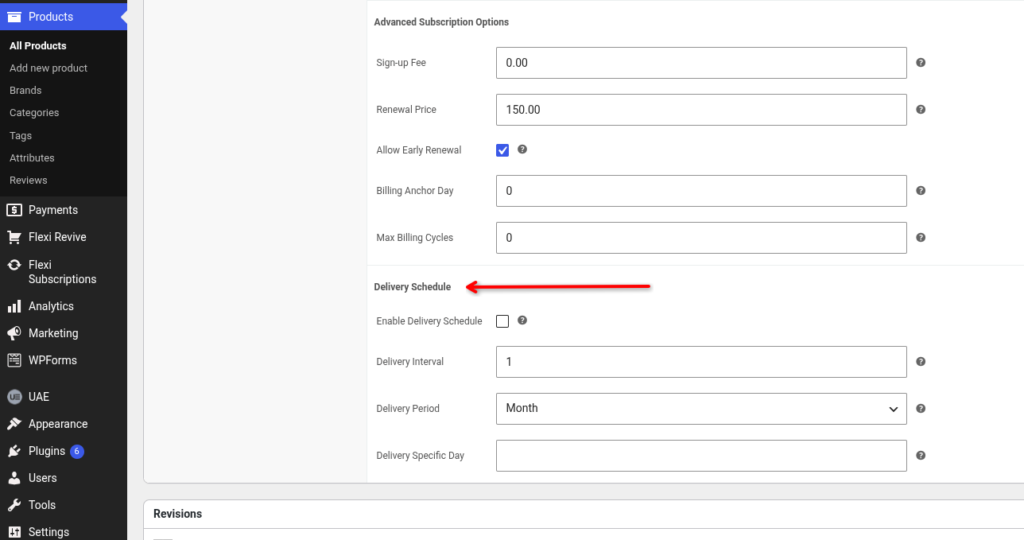
Available delivery options include:
- Enable Delivery Schedule
- Delivery Interval
- Delivery Period
- Delivery Specific Day
Use these settings when subscription renewals should also trigger scheduled deliveries.
Publish the Product #
After configuring the subscription settings:
- Review all product information.
- Verify your pricing and billing configuration.
- Click Publish or Update.
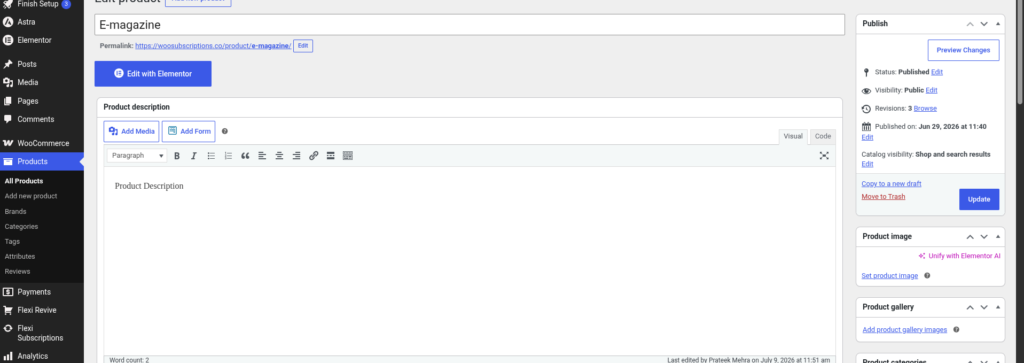
Your subscription product is now available for customers to purchase.
Place a Test Order #
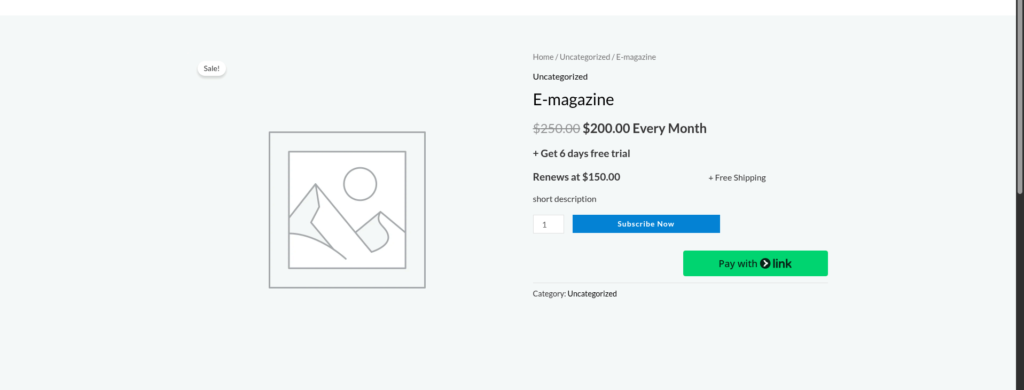
Before making the product available on your live store, it’s recommended to complete a test purchase.
During testing, verify that:
- The product can be added to the cart.
- Checkout completes successfully.
- A subscription is created automatically.
- Renewal dates are generated correctly.
- Customer emails are received.
- The subscription appears in the Subscriptions page.
Testing helps ensure that your subscription settings and payment gateway are working as expected.
Understanding the Subscription Lifecycle #
After a successful purchase, Flexi Subscription automatically manages the subscription based on your configured settings.
The typical lifecycle is:
- Customer purchases the subscription.
- The subscription becomes active.
- Trial period begins (if enabled).
- The first renewal is scheduled.
- Renewal payments are processed automatically according to the billing schedule.
- The subscription continues until it is cancelled, expires, or reaches its maximum billing cycles.
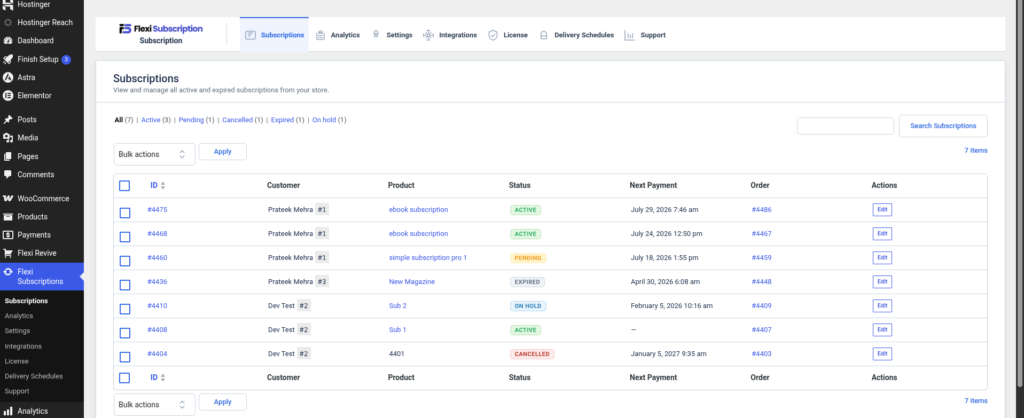
You can monitor and manage every subscription from WordPress → Flexi Subscription → Subscriptions.
Best Practices #
- Test every subscription product before publishing it.
- Verify billing intervals and renewal prices carefully.
- Use realistic trial periods to avoid customer confusion.
- Enable customer cancellation if you want subscribers to manage their own subscriptions.
- Review renewal schedules after creating a new subscription product.
- Confirm your payment gateway supports recurring payments before launching.